Tuesday, December 2, 2008

Handmade Vintage Gift Tags

I have just fallen in love with these tags!! I have decided to put them on all of my Christmas gifts! They are so easy and so very pretty to make! Just think of all of the different graphics you could put on these!! For the little ones, you could put their picture on them so they can find their own gifts. Cartoon characters, family members, words, clip art, the possibilities are endless!!

To make these tags you will need some sort of graphic program (I used Publisher but I think you might be able to make these in Word), tag templates, graphics, and card stock.

I got my tag templates from 2 different sites: Family Crafts and Craft Ideas

My graphics come from Silver Collect, 24k Vintage Art, Chicks57, and Publisher clip art.
All 3 sites allow you to use their graphics as long as there is no intent to sell any products with the graphics on it. Also, to get the graphics from 24k, you have to join the site. It is free to get the Christmas graphics and you just need your name and email to register.

To get started, download the tag template of your choice into graphic program. Next, download graphic to same program. Stretch or shrink the graphic to fit inside the tag. Add any words or text you may like. Print onto card stock, cut out tags, and punch a hole through the top.

These tags make a great addition to all of those gift bags we like to reuse!! They just add a nice, personal touch!! Oh, don't forget to fill out the "To & From" on the back side of the tag!!

Sunday, November 30, 2008

Here are some more links of Christmas gifts to make and decorations for your home.

Handmade Napkins

Pet Gifts

Round Casserole Tote

Honey Cuticle Cream

"Plastic Bag" Lunch Sack

Candy Cane Cozy (Crochet)

Christmas Card Luminaries

Snowmen Patterns for assorted crafts (must purchase patterns)

Christmas Tree Hair bows

Congrats Tara & Ryne!!!

My sister got married this weekend!! They decided to go down to Gatlinburg, TN by themselves and have a little wedding. The got married in Cupid's Chapel O' Love, of all places! They got back in town today and we had a small party at my grandmother's house for them.

I made the cake and it had a small lean to it, so I just put more icing on that side!


Duct Tape Ornament


My sister got married this weekend and for wedding presents the family decided to get them Christmas ornaments. Her husband, Ryne, has an obsession with duct tape! For Christmas every year, we get him so kind of duct tape themed gift. So, I couldn't let him have a tree without a duct tape ornament!! My cost on this was nothing because I had all the supplies already on hand! I found the instructions here to make these.

Tuesday, November 25, 2008

Oven Mitts for Little Hands


This is the Christmas project on my list today. I am making oven mitts for Jaiden and Arya to use in their play kitchen. The regular adult sizes are huge for their little hands so, I scaled them down to size. These are fairly quick and easy to make!

You'll need:
Approx. 2 12" squares of pre-quilted fabric
Approx. 2 12" squares of coordinating fabric
regular sized oven mitt (for pattern)
Approx. 2 6" pieces of bias tape


1. Using your oven mitt as a pattern, scale it down and mark on wrong side of pre-quilted material.

2. Cut out 2 out of the pre-quilted material and 2 from cotton fabric. Layer in the following order: cotton, pre-quilted right side up, pre-quilted wrong side up, and cotton. Use lots of pins to hold together.

3. Sew quilt binding to bottom edges of the oven mitt. Be sure to allow a little to hang over the sides. Make sure to catch both the cotton and pre-quilted fabric.


4. Sew oven mitt together using a 1/4" seam allowance. Turn right side out.

Here is the oven mitt in proportion to the regular size one:

Just as a note: These are in no way intended to be used in conjunction with a real oven.

Monday, November 24, 2008

Christmas Project Links

So much going on here in the Red Mommy household!! I am currently in the middle of a huge project to be able to put my Christmas tree up on Friday! Plus, Jaiden is on Thanksgiving break so we got a full week of plans.

I've got some Christmas presents to work on so, here's some links out of my favorites collection until I can get some more of my own projects up:

American Prim - tons of tutorials on Christmas and winter primitive crafts

Make Stuff - tons of crafts like decorating ideas, ornaments, recipes, wreaths, and tips

Of Worth - lots of recipes for bath salts, lotions, and other toiletries

Recipe Gold Mine - Gifts to make from A to Z

Heart Felt Holidays - tons of gag like gifts for Christmas like melted snowmen, Grinch poop, and Santa keys

Better Homes - really pretty candy centerpieces

Embroidery Library - very pretty Christmas tree skirt

Fun Christmas Gift Tags

When I made these gift tags, my original project was miles away! Ryan and I went to Walmart and saw some very cute Christmas shirts for the girls. They had puffy vinyl Christmas decorations on them. I thought, I could make those. What never occurred to me at the time, my creative juices were flowing, is yes I can make them but, I could never wash them! So, I had vinyl, thread, and glitter, what to do? I sew with vinyl all of the time do I started playing. I ended up with gift tags. I thought they would look so cute as an added something to a gift bag or box. Or, even a fun necklace for the girls to wear!

You'll need:
vinyl (black backing paper)
glitter
cookie sprinkles
ribbon
wax paper*

1. Make sure you vinyl is cut straight after buying it. I like to take my ruler and a sharpie and outline the edges so I can see where they are.

2. Cut a rectangle out of the vinyl to 5 3/4x 3 1/2. Fold in half and cut on crease to create 2 rectangles.

3. Place wax paper on vinyl and use a zig zag stitch to stitch 3 sides.

4. Peel off the wax paper. Your tag should now look like this:

5. Fill the tag with the goodies you have chosen. Stitch bag along the top to close. About a presser foot away from stitching, stitch again. Using a hole punch, punch a hole in the center top of the tag. (Black dot in picture)

6. Run a ribbon through tag and attach to package.


* You might or might not need the wax paper. My machine sews fine with vinyl on the bottom but, will not sew with vinyl on the top. With the wax paper, the sewing machine works just fine. If you have never sewn with vinyl, test out to see how you machine handles it the best.

Sunday, November 23, 2008

Gifts From the Christmas Kitchen


This is a really great book to have! I bought it several years ago when the office that I worked for was having a book fair. So many great ideas inside!!

The table of contents includes:
Gift giving tips
Sensational seasonal tips
Glorious gifts in a jar
Yuletide breads and muffins
Cookie tin express
Visions of sugarplums

Some of the gifts in a jar include, Rib Tickling BBQ Sauce, Chocolate Cherry Chutney, Cranberry Peach Freezer Jam, Peanut Butter Fudge Sauce, and Mocha Espresso Mix. Just jam packed with recipes!!

From the back of the book, "The holiday season is the time to show the special people in your life just how much you care. Avoid the crowded mall and spend the time at home whipping up unique snack mixes, savory mustard's or sweet preserves. Baskets of freshly baked bread and muffins will warm the hearts of friends and neighbors. Don't forget the chocoholic on your list with a tin of deliciously decant cookies and candies. Spread lots of holiday cheer with homemade gifts."

Saturday, November 22, 2008

Indian Corn


I think this is so neat!!! Jaiden's teacher at school made Indian corn to put in their activity table. I think the table is actually called a sand and water table but her class puts all kinds of neat stuff in there. Jaiden's teacher, Mrs. Donner bought big bags of popcorn kernels at GFS (bulk store) and used food coloring to get the different colors. She said she poured the popcorn in 4 different tubs. She used red on one tub, left one tub regular, One tub was red and yellow mixed, and used a mix of green and blue to get the brown like color.

The kids were having such a fun time playing with this yesterday! They love to stick their hands in it and pour it into different containers. She had already switched the table over to Christmas when I came to pick Jaiden up. I wished I could have got a picture of it in the table!!

Friday, November 21, 2008

Fun Word Art

This is a really neat site that allows you to make all kinds of word art; Wordle!! You type in words and them you can decide on layout, font, and color. After you make your word art, you can either print it out on card stock and put it in a pretty frame or you could print it and put it into your graphic program and make T-shits. Would be really nice for different groups; IE. church, scouts, or a family function.

This is mine: (Amber's). I could not get the picture to post! I had a lot of fun with this!

Wednesday, November 19, 2008

Magic Christmas Pillowcases


These "magic" pillowcases are to help your little one get to sleep on Christmas Eve while anxiously awaiting the arrival of Santa Claus. I have seen them for sale on Ebay, ETSY, and other web sites for over $10.00!! They are so easy to make, why pay for them??? I have $2.50 and less than a half hour invested in each one! I am planning to give these to Jaiden's classmates for Christmas. There is no way I could fill nice looking treat bags for $2.50!!

If you can sew a straight stitch, then you can make these!! So very simple!

You'll need:
27"x40" of Christmas or Holiday print
6 ½"x40" strip of coordinating fabric
Thread matching coordinating fabric
card stock

1. With wrong sides together, sew strip to one long end of Christmas fabric.
2. Press seams towards Christmas fabric.


3. Lay fabric wrong side up. Fold down edge of coordinating fabric down to seam line and pin. Iron fold to get a nice crease.

4. On right side of fabric and with matching thread, top stitch where strip and Christmas fabric meet. This will catch the raw edge on the other side, forming the top of the pillowcase.

5. Fold the pillowcase wrong side out matching edges to form the actual pillowcase. Sew with a 1/4" seam allowance. Go back and stitch again 1/4" away from seam line.


6. Turn right side out and iron flat.


7. Print out poem on card stock. (I used Publisher to make my poem. Any word program will do if you do not have Publisher.)

December is a magical time
With all sorts of colors, ribbons, and rhymes.

Sugarplum fairies will dance in your head,
If you put this special pillowcase on your bed.

The reason is special
As you will see

It's that it has been dusted
With Christmas Fantasy.

Visions of candy canes, Santa and treasures
Will fill each dream with sweetness and pleasures.

When the time comes for it to be washed,
Do it quickly so no magic is lost!

-Author Unknown


I know there are a lot of creative ways to package this together better than how I did!! That is just not my "speciality"!! I am very open to ideas!! If you make some, please share how you packaged them!!

Tuesday, November 18, 2008

Strawberries & Cream Fudge


I couldn't help myself! Yes, it's another fudge recipe!! This is quickly becoming my new favorite. It smells so good and looks so pretty!

Strawberries & Cream Fudge

You'll need:
White Chocolate Fudge Recipe
Strawberry Syrup (kind you add to milk)

1. Make white chocolate fudge and pour into 9x13 pan.
2. Pour small amounts of syrup on top of fudge and swirl with a fork.
3. Refrigerate fudge for 1-2 hours before cutting or removing from wax paper.

This fudge will be a little sticky. But, it has great flavor!

Buckeyes


What most of you call peanut butter balls, we call buckeyes here in Ohio. This is a good recipe given to me by my grandmother's sister. Just make sure to make more that what you need because they disappear fast!

Buckeyes

2 lbs. powdered sugar
2 sticks butter, very soft, almost melted
2 lbs. peanut butter
2 c. Rice Crispies (I use generic)
12 oz. chocolate chips
3/4 block of paraffin wax

1. Mix all ingredients except for chocolate and wax very well.
2. With your hands, form mixture into small balls.
3.Chop wax into small pieces and melt in small sauce pan.
4. Add chocolate chips and continue to stir. When chocolate is completed melted, remove from heat.
5. Using a fork, dip balls into chocolate, leaving a bare spot on the top. (This creates the eye of the buckeye)
6. Put on a cookie sheet lined with wax paper to harden. Place in freezer for about 10 minutes to allow chocolate to harden and set.

Makes about 125 Buckeyes


Here are my tips for making these:
1. Use your hands to mix the peanut butter, sugar, and butter. You will know it is well mixed when you cannot see the powdered sugar.
2.Make sure to chop the wax into small pieces so it will melt faster.
3. I do not use a double boiler to melt my wax and chocolate. (I do not own one) I just use a medium low heat and watch it carefully.

4.Some people like to use a toothpick to dip the balls into the chocolate. I do not like to do this because you can see the toothpick hole when you are finished.

Monday, November 17, 2008

12 Days of Christmas

I found this really neat blog for any stampers of paper crafters out there. You all know my abilities, or lack there of, but I know that there are a lot of you out there with these talents! The blog counts down the 12 days of Christmas with a different project to make each day.

1st Day -Chocolate Kisses Pail
2nd Day -Treat Bag
3rd Day -Christmas Lunch Box
4th Day -Gourmet Cocoa Cones
5th Day- Candy Box
6th Day -Cookie Bags
7th Day -Secret Santa Gift
8th Day -Cookie Exchange Gift Set
9th Day -Gift Card Holders
10th Day -Hostess Gift
11th Day -Christmas Ornaments
12th Day -Christmas Cards

Here is the main page of the blog: Polished to Perfection

Sunday, November 16, 2008

Ring Twirlers


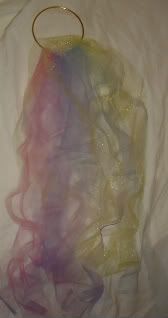
I made this for Jaiden this past summer. Jaiden loves to play princess and liked to play with her magic wand. All I could see was Arya getting poked in the eye or Jaiden falling on it. I told Jaiden that this was only for very special princesses; they are magic princess ring twirlers. She loves to hold one in each hand and twirl around the room.

Very easy to make and very inexpensive!! I got a metal rings (I found them at Hobby Lobby) and knotted strips of tulle around the ring.

Perfect for any princess!

$4 Pretty Candle Holder


I think this is so pretty and would make a nice centerpiece for a table. Would also look nice for two of them on each side of a mantle. I got all of my supplies at the dollar store.

You'll need:
candle stick
round mirror
large candle votive holder
candle
E600 glue

Glue upside down candle holder to mirror and let dry. Glue votive holder to bottom of candle stick. Let dry overnight for maximum hold. Add candle and light.

You could even add some Christmas greenery to the bottom for a very festive look!

Thanksgiving Snack Mix


This is what I am giving Jaiden's teachers for a Thanksgiving gift this year. Really easy to make! It is equal portions of candy corn to peanuts and half portion of raisins. I got the containers at the Thrift Store for a big $0.29!!

They are really festive and they make a nice, inexpensive gift for teachers!

Saturday, November 15, 2008

Santa Ornaments


These have got to be the cutest Santa ornaments I have ever seen!!! A BIG THANKS to "Shaun" at Garden Web Crafts Forum for allowing me to post this on my blog!!!

Supplies

Hot Glue Gun
Glass Balls
Red Felt
Wiggly Eyes
Red Balls for noses
glasses
Craft Boa
wide (12mm) white pipe cleaners
1" white pom poms

Cut felt to resemble a b-day hat. Hot glue edges together and then turn inside out. Looks like a dunce cap.

1. Glue pipe cleaner around base of hat; glue pom pom on tip of hat.

2. Glue Hat to Glass Ball (not too far down)

3. Glue Eyes on Ball

4. Glue Nose on Ball

5. Glue or push glasses (ends of frames) under the hat letting the lenses rest on nose.

6. Bend pipe cleaner into a V shape, glue the V part under nose then bend the ends up over cheeks and glue end to edge of hat. Cut off any extra little piece.

7. Glue boa just at the bottom of the pipe cleaner, going around his face up to the edge of hat.

8. Bend tip of hat over and glue to side.

Add little ornaments to front of cap.

Using ice pick, poke hole into top of hat and push thin ribbon thru then tie a knot. This is so you can hang it.

I think that's it.

Hope I explained it well enough! Good Luck!!


Thanks Again "Shaun"!!! Wouldn't these be such a nice gift at an ornament exchange????

Christmas Lights & Singing Houses


It is a house in Mason, Ohio, about 15 minutes east of me. Last year or the year before, he was ordered by the city to take down the display. Mr. Williams' house of lights was featured on a Bud Light commercial last Christmas.

When is enough an enough?


Another singing house!

Friday, November 14, 2008

The Time Traveler's Wife


This book was so good!! When Claire was 6 years old she firsts sees Henry in the woods by her house. Henry tells Claire that he is a time traveler and they will become involved in the future; Henry cannot control where or to when he time travels. Claire continues to see Henry through her childhood until one day, Henry tells Claire that she will not see him again to she is an adult. Claire does run into Henry when she is about 18 or 19 and he does not remember her because what was Claire's past is Henry's future. The book continues on flashing back between present, past and future and how Claire and Henry interact.

This book does not have a lot of science fiction in it. I am not a science fiction fan but, this book has the right amount. The only science fiction about it is the time traveling. It kind of reminds me of the show Quantum Leap without the different body leaps.

I read this book in 2 nights because it was such a good read!! Ryan even read it after me! And, we never agree on books!! This is one of the greatest love stories in a long time!